Step 1: Login to Payex’s portal #
Log on to our portal at https://portal.payex.io/Home, and key-in your credentials.
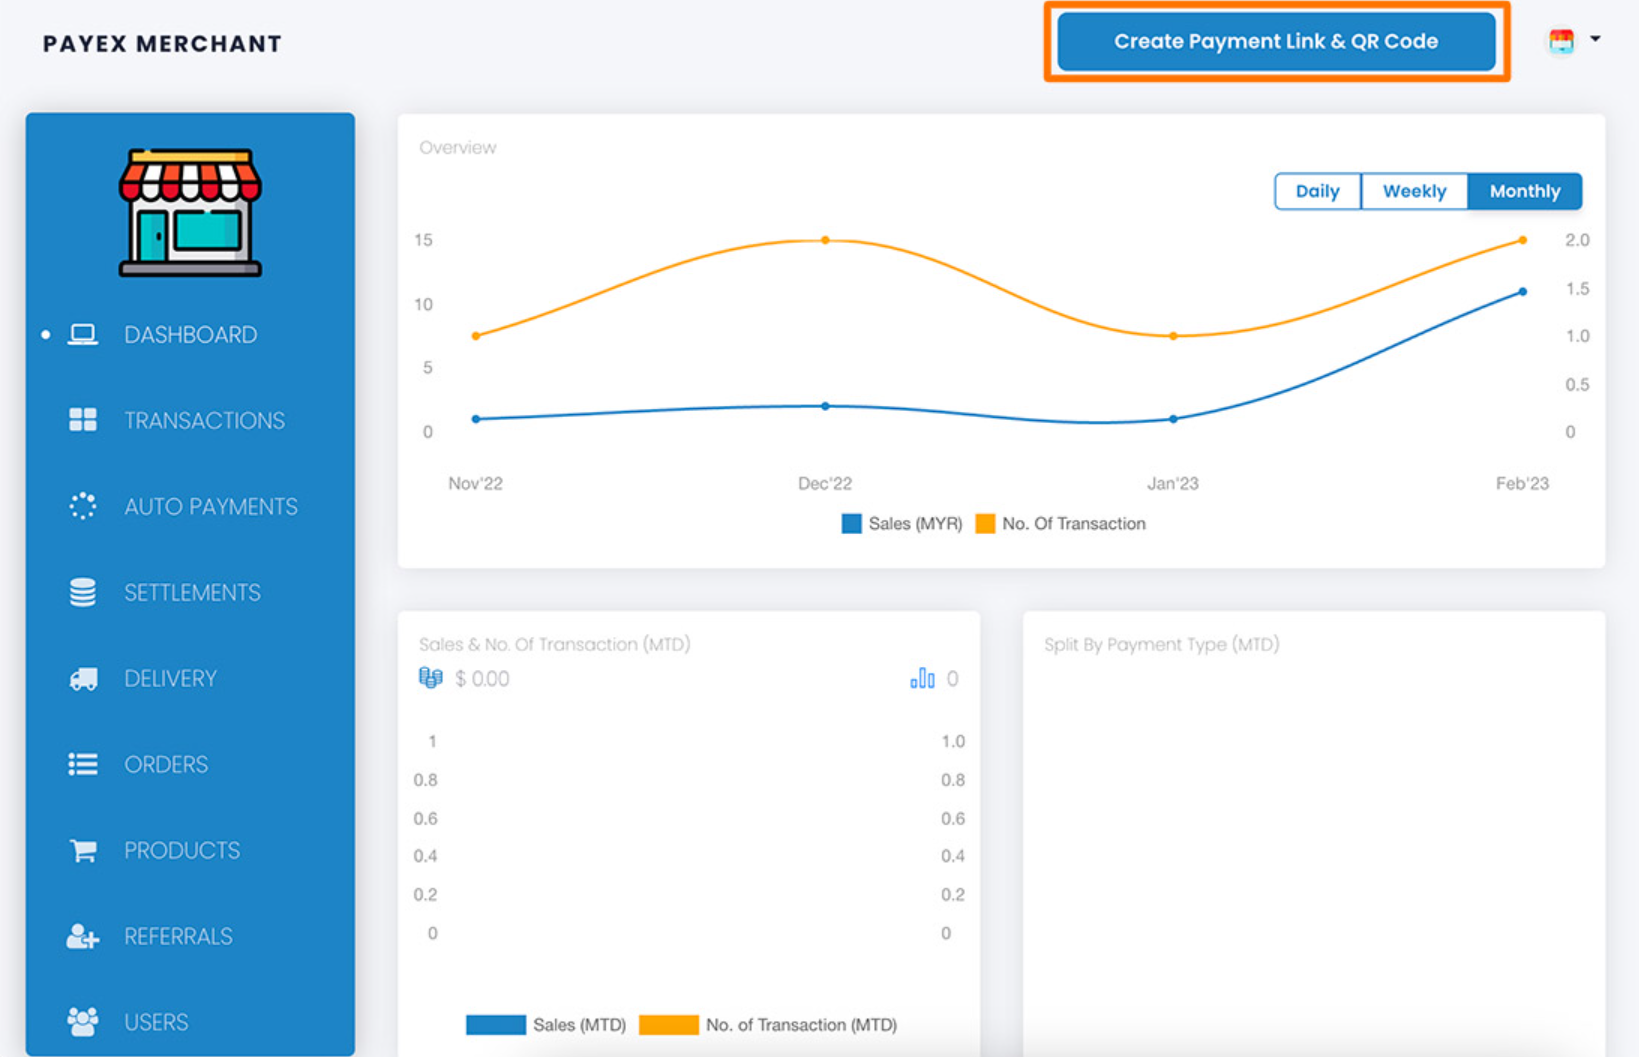
Step 2: Create payment link & QR code #
Click the “Create Payment Link & QR Code” button on the top of the page once you’re logged in.
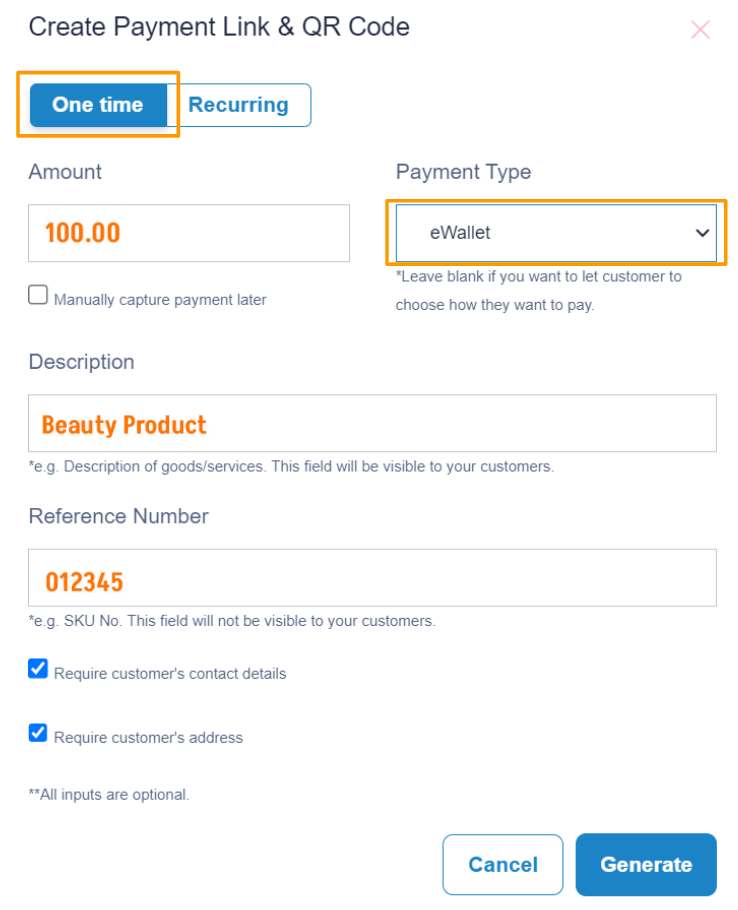
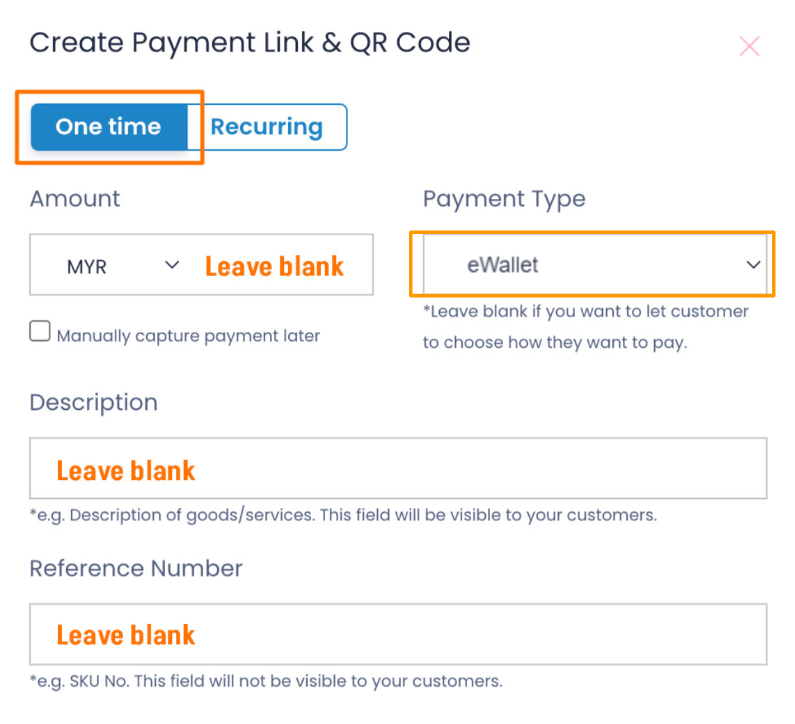
Step 3: Fill out payment details #
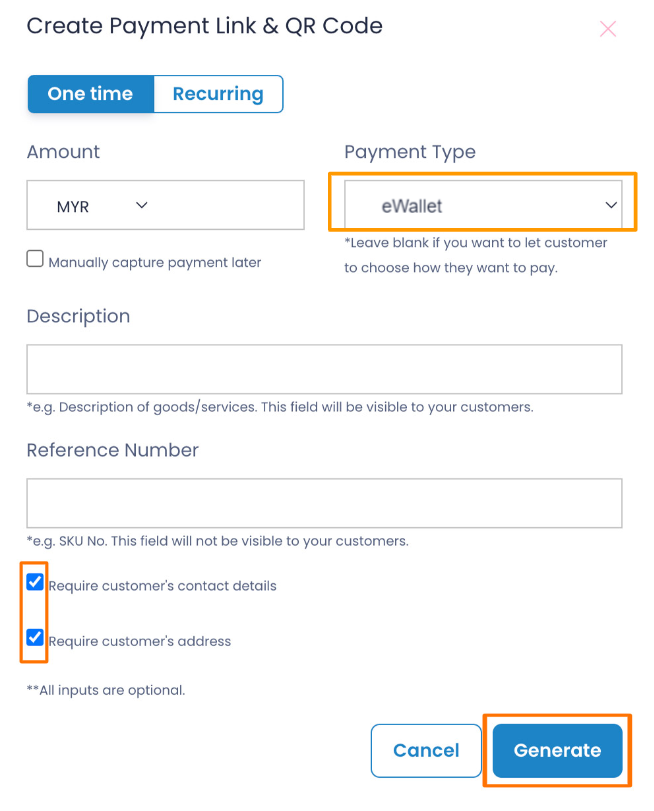
For GrabPay Later payment link, click the “One time” tab and make sure to select “eWallet” as Payment Type. There are 2 options:
Option 1: To create a GrabPay Later payment link with the amount, description and reference number determined by the merchant, fill in all the fields on the form.
Option 2: To create a GrabPay Later payment link for general use, leave the fields blank to be filled out by the customer.
Step 4: Generate payment link & QR code #
- Uncheck the box for “Require customer’s contact details” if you do not require customer’s details.
- Uncheck the box for “Require customer’s address” if you do not require customer’s address.
- Click the “Generate” button to generate the payment link & QR code.
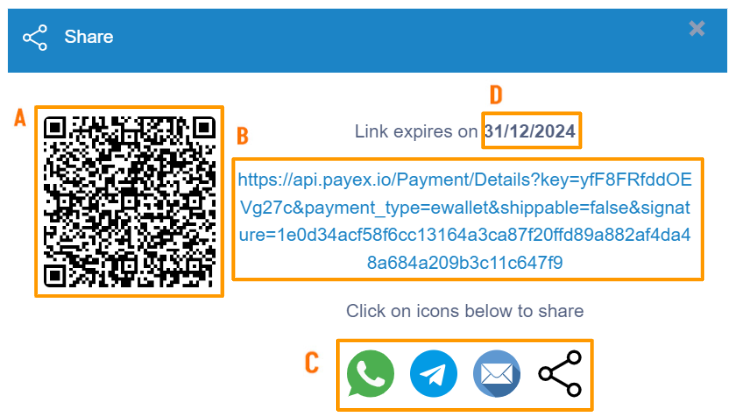
Step 5: Save & share payment link & QR code #
A: Right-click and select “Save” to store the QR code to be printed and displayed at your cashier counter.
B: Copy the payment link to save or share to your customers.
C: Click on any platform’s icons to share the payment link to your customers.
D: Do note the expiry date of your payment link. All payment links are valid for 1 year from the date of creation.