Table of Contents
Step 1: Login to ezbeli’s self-service portal #
- Click “Login” button at https://ezbeli.com.my/my-account/
- Login using your existing credentials
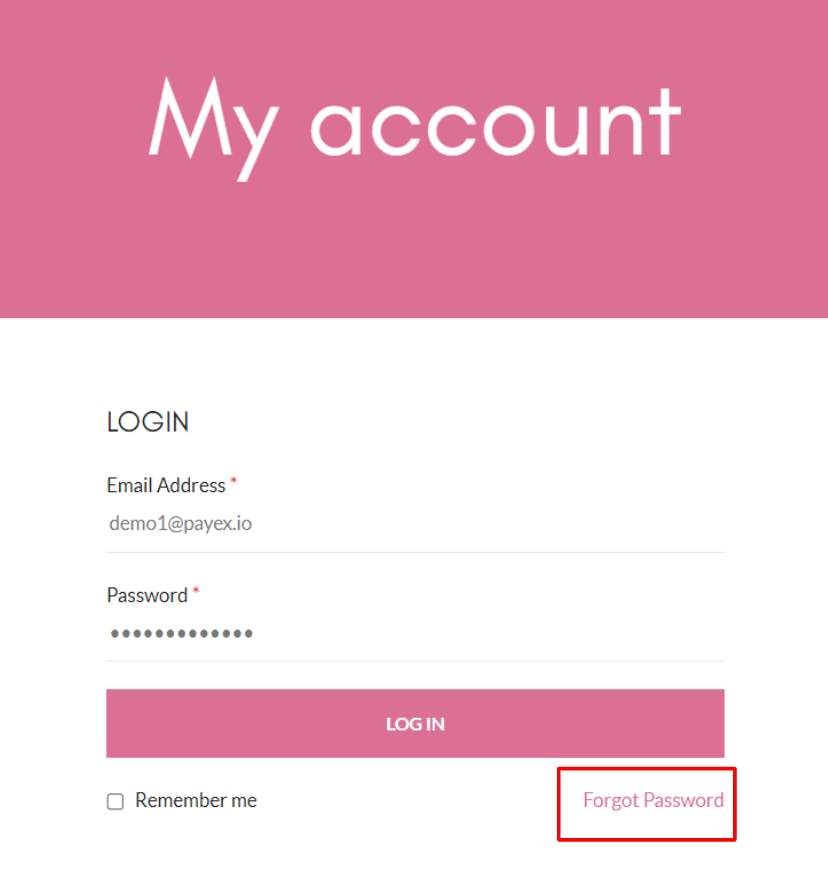
- For first-time login, don’t forget to reset your password by clicking “Forgot Password” at the login page
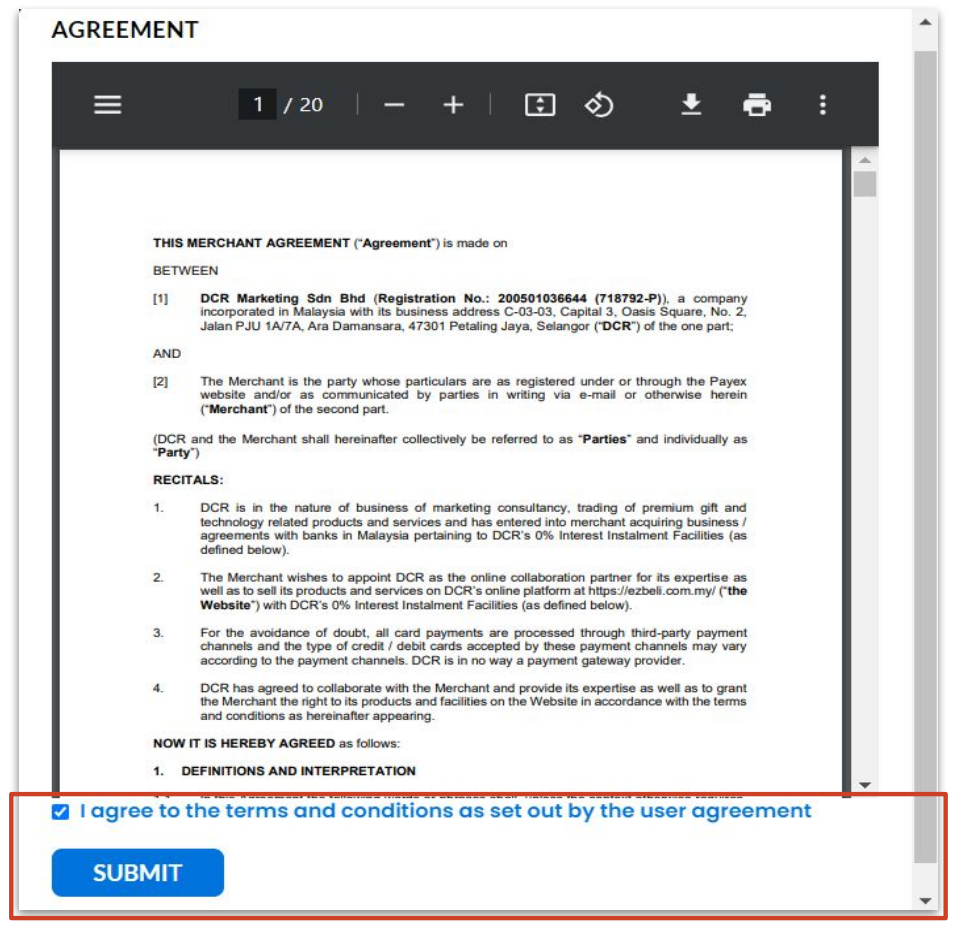
- For first-time login, you will need to check the box to indicate agreement to T&C set out by the user agreement
Step 2: Add product and fill out the product details #
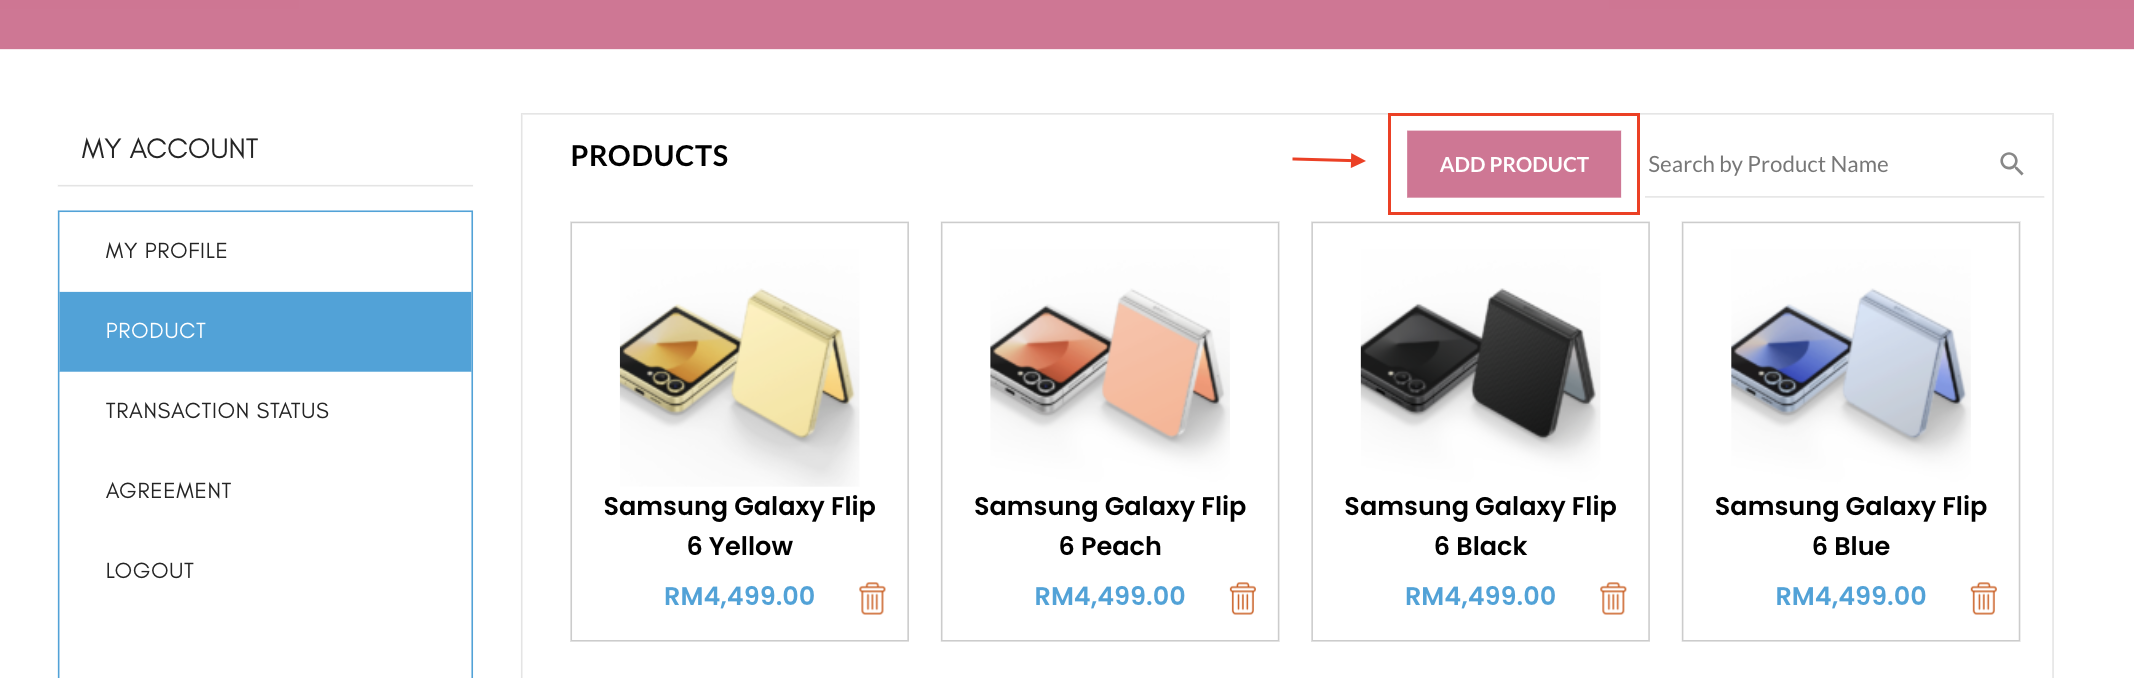
- Go to “Product” tab.
- Click “Add Product”
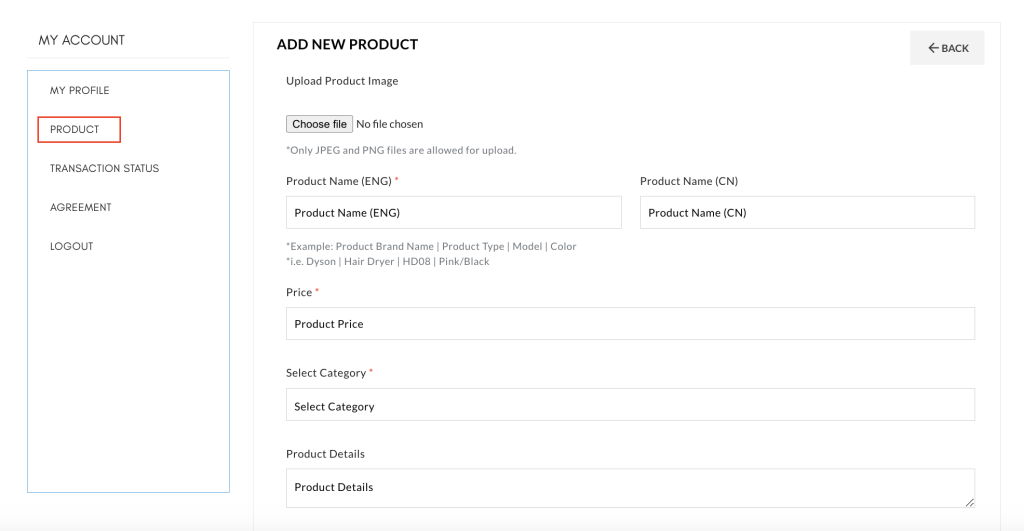
- Upload Product Image is mandatory (Required resolution: 700px X 800px)
- Please ensure product listing meets the criteria below:
- The correct product/service visual is uploaded in the Product Image
- The product name has to be clear and accurate, refer example stated above
- The product price must accurately reflect the service/item value
- Fill out payment details
- Customer address and phone number is no longer optional
You can now share your Ezbeli QR Code for customers to scan, checkout & pay
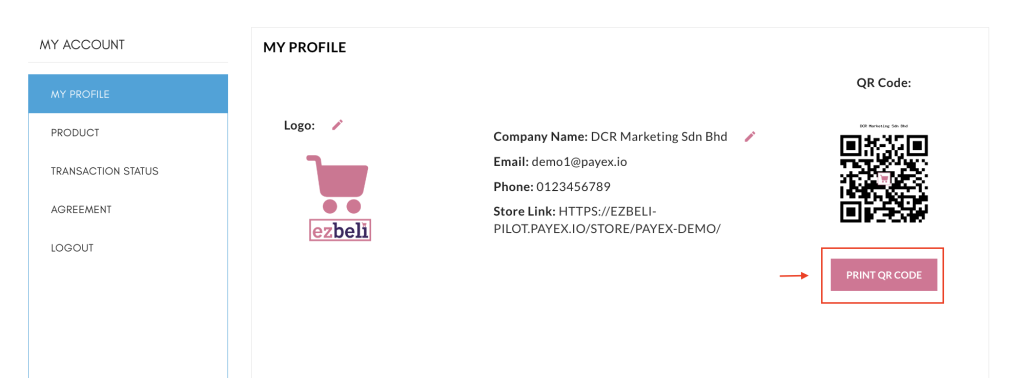
- Publish your products on your Ezbeli Store for Checkout via QR Code by:
- Upload Product Image is required (Required resolution: 700px X 800px). If no image is uploaded, the store logo will be used instead
- Set product catalogue visibility to “Shop only” (Please note: products that are set to hidden will not show on your store)
- Click PRINT QR CODE to generate your store QR
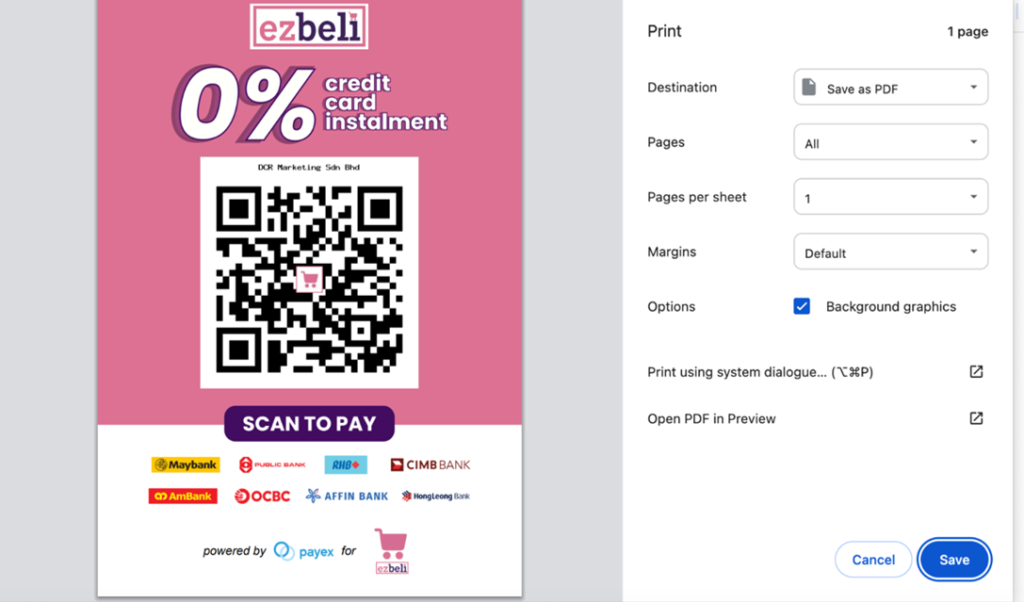
- Click Save to download the QR PDF file to your device
- Print the QR code if physical copy is needed
- Customer may scan the QR code, add product to cart and pay via credit card instalments
- Preset your customer preferred bank/tenure for each product link
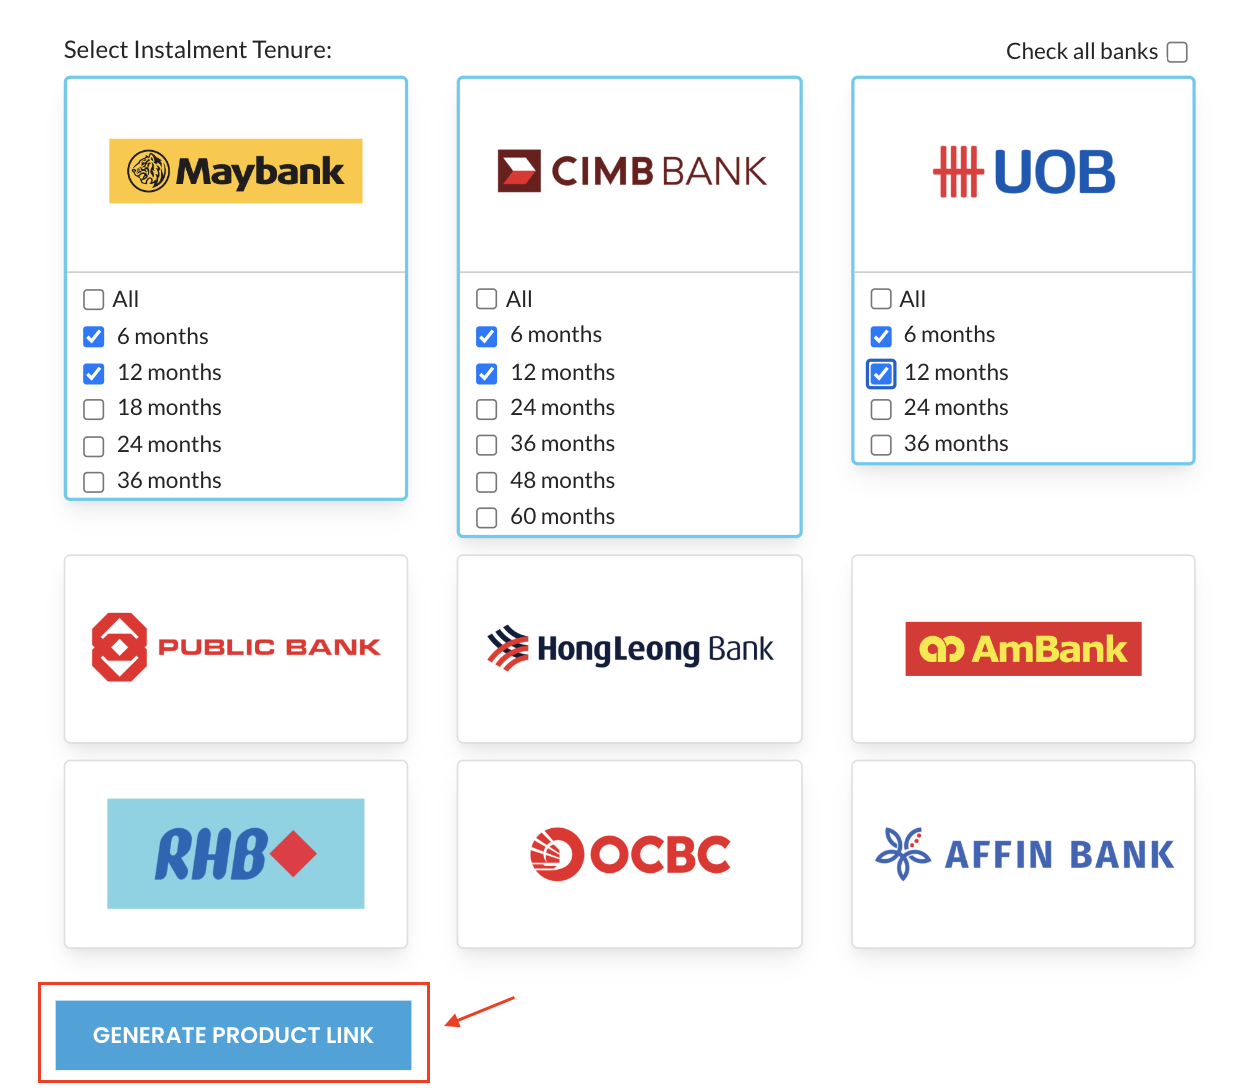
- Click “Generate Product Link”
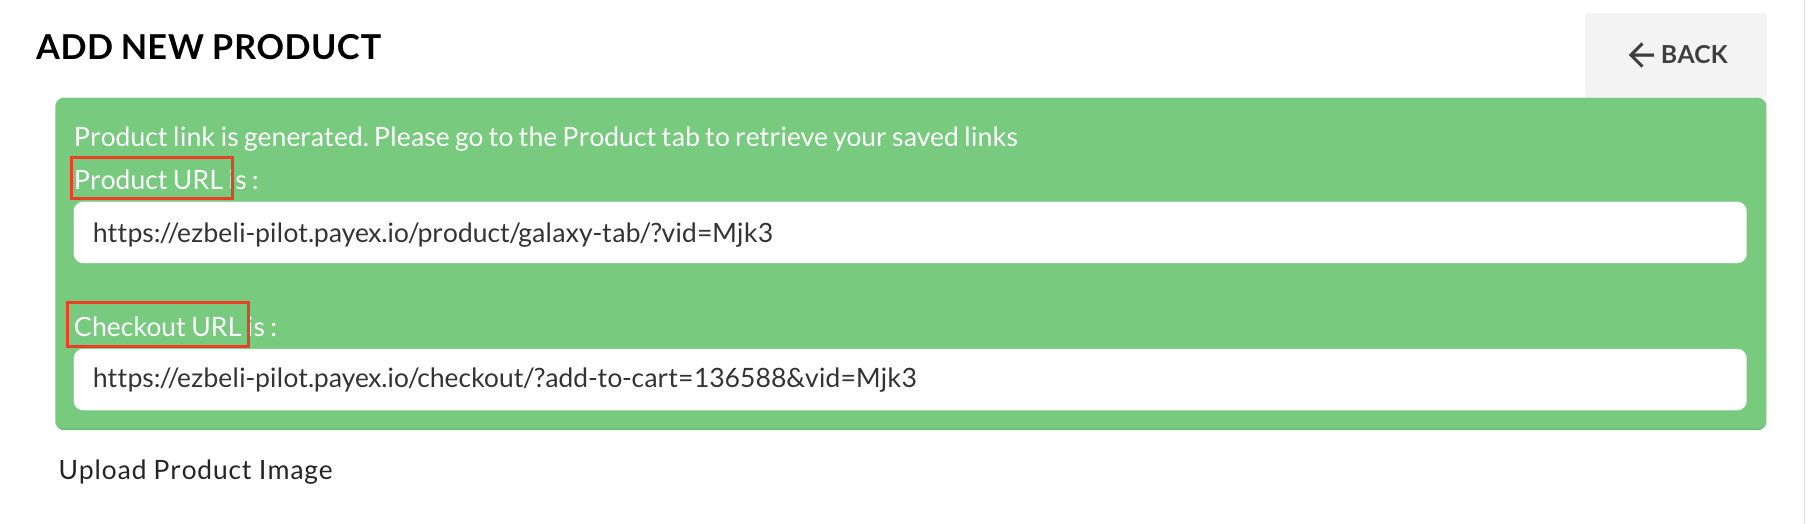
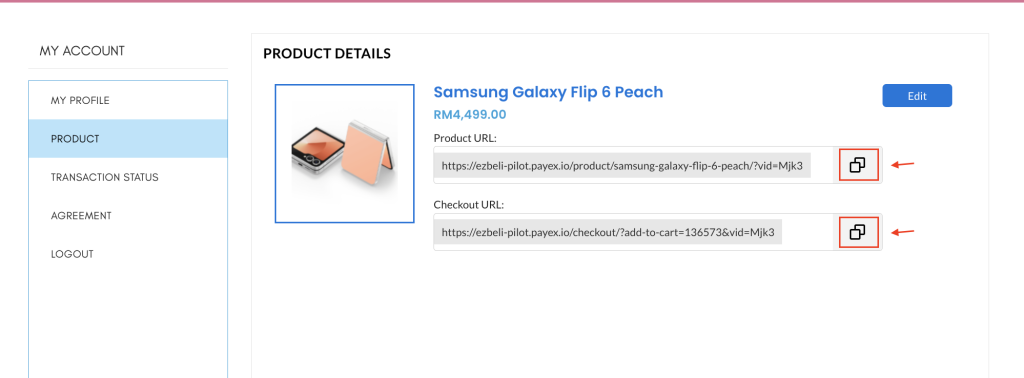
2 types of product links will be displayed, you may choose the one preferred:
- Product URL – a link where your customer can view product image, change quantity and add to cart before proceed to checkout
- Checkout URL – a link where your customer can proceed to fill out basic details and pay directly
Step 3: Share product link #
- You may click the “Copy” icon to copy the product link (Product URL / Checkout URL) and share to your customer
- If you happened to lose your product link, you may retrieve it under the “Product” tab
Edit product >> #
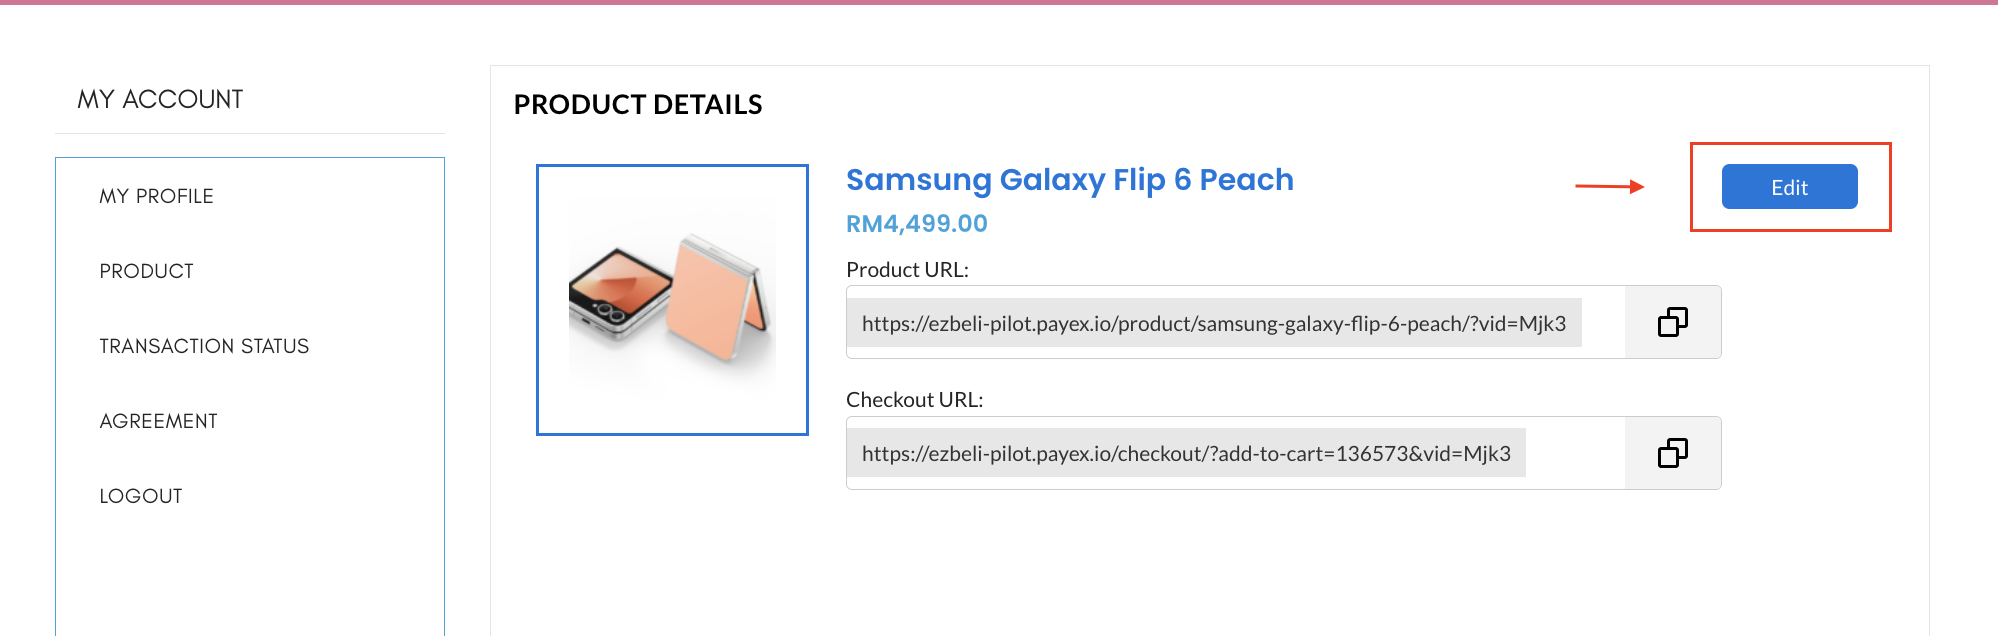
- Click the ‘Edit‘ button to make changes to the product previously added
Delete product >> #
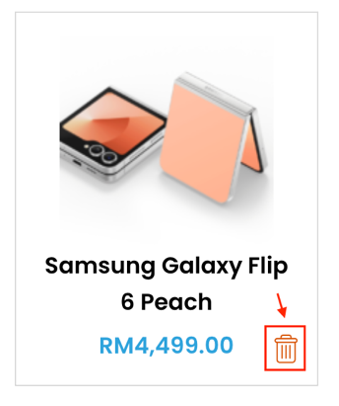
- Click the ‘Trash Bin” icon to delete the product added from your merchant account
Step 4: Monitor transaction status #
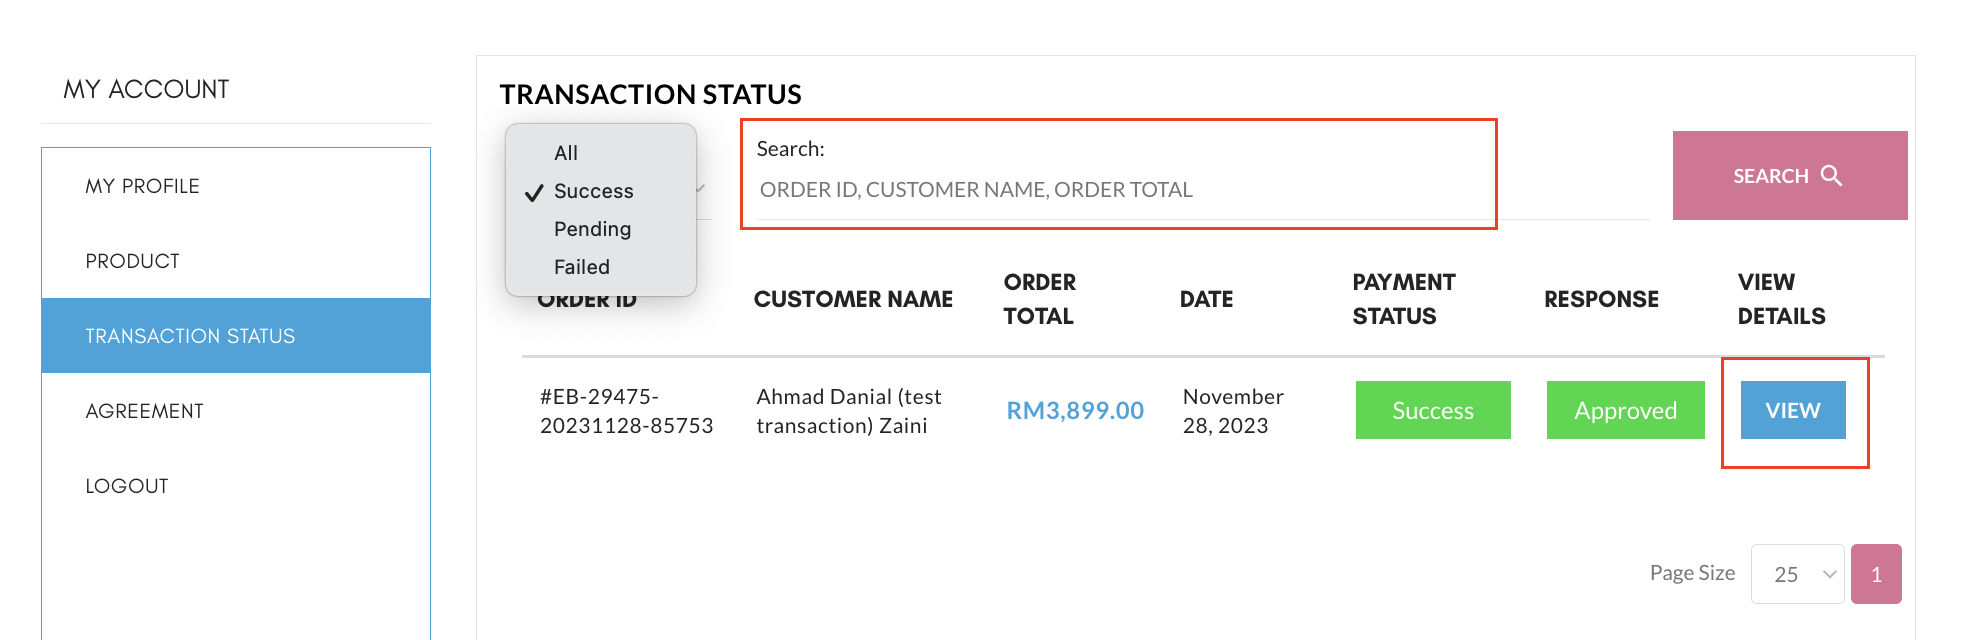
- Click “Transaction Status”
- Click “View” to view additional customer details and order details
- Transaction status –
- Pending – Customer did not proceed to pay after clicking “Pay with Payex” or did not complete filling out the payment details
- Success – Payment successful
- Failed – Payment failed
❗ Note:
1. You can also check the transaction status from merchant’s Payex’s portal
2. However, only “Success” / “Failed” payment status would show up on the merchant’s Payex Portal
Step 5: Notification on new order and payment notification from customer #
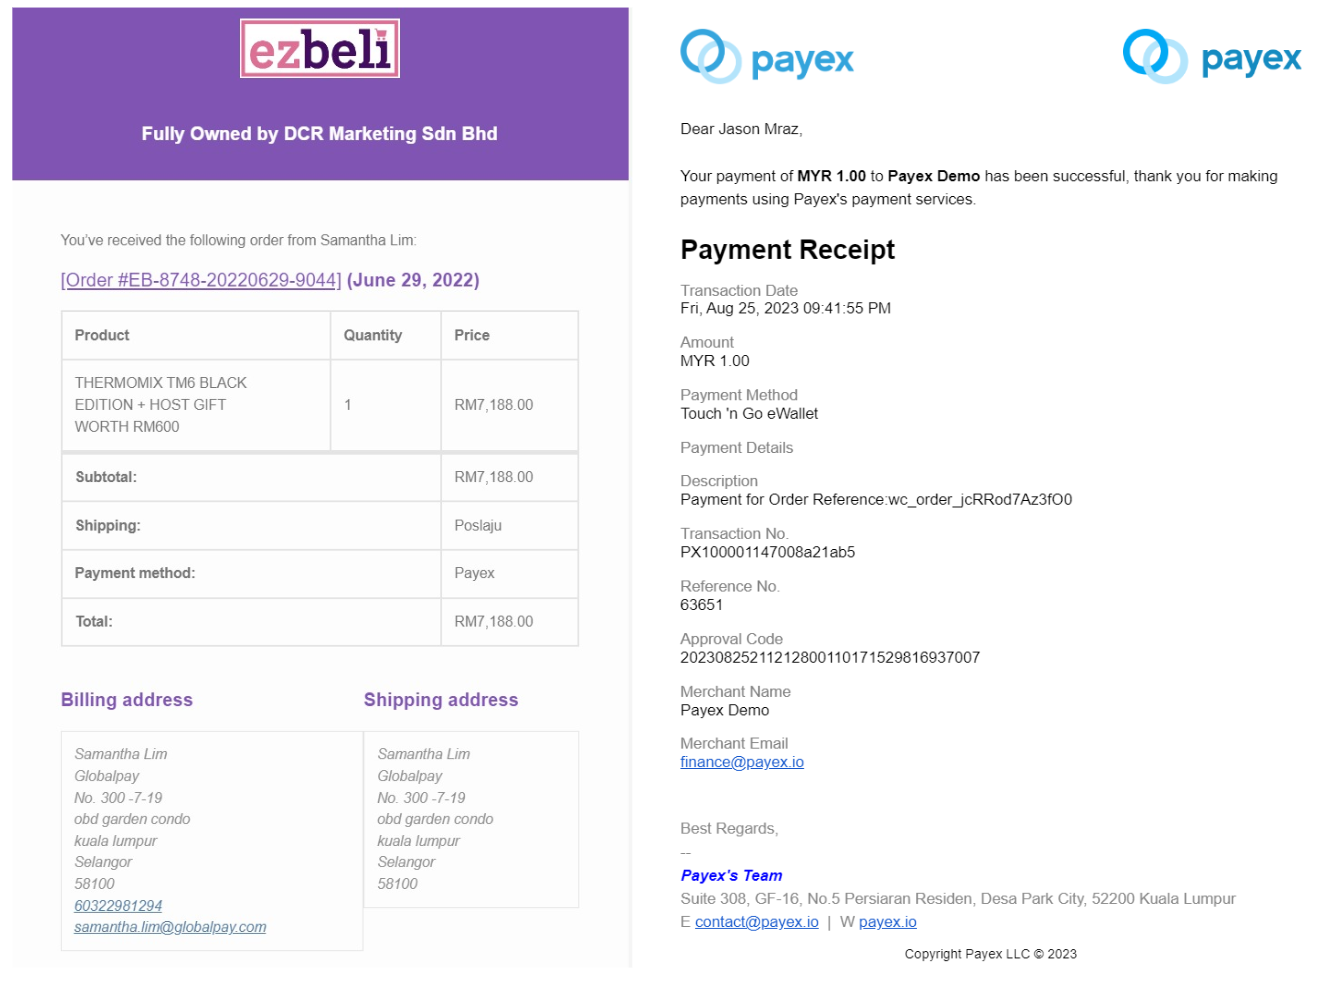
- You will receive email notification from Ezbeli for every new order
- You will receive payment notification from Payex (via contact@payex.io) for every successful payment by your customer
Step 6: Payex portal transaction monitoring #
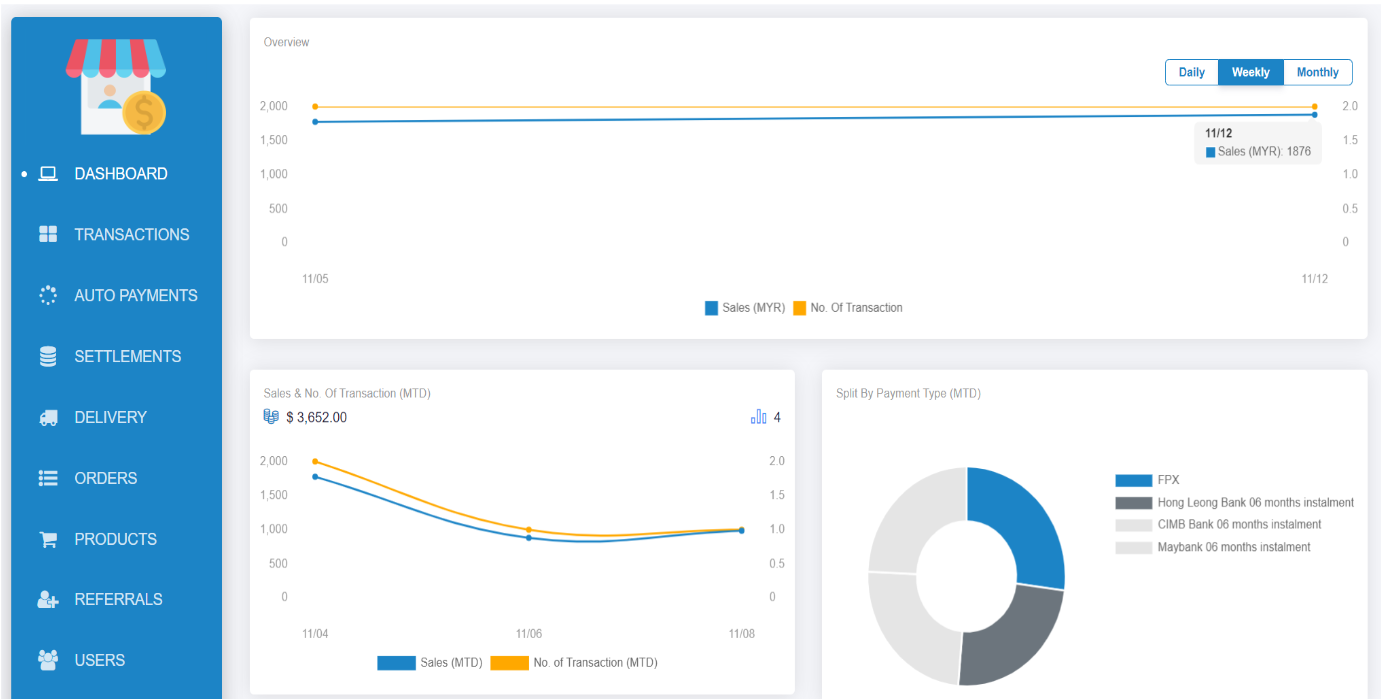
- Login to your Payex Portal
- You get to monitor your transactions on Payex Portal > Click “Dashboard” at the side bar
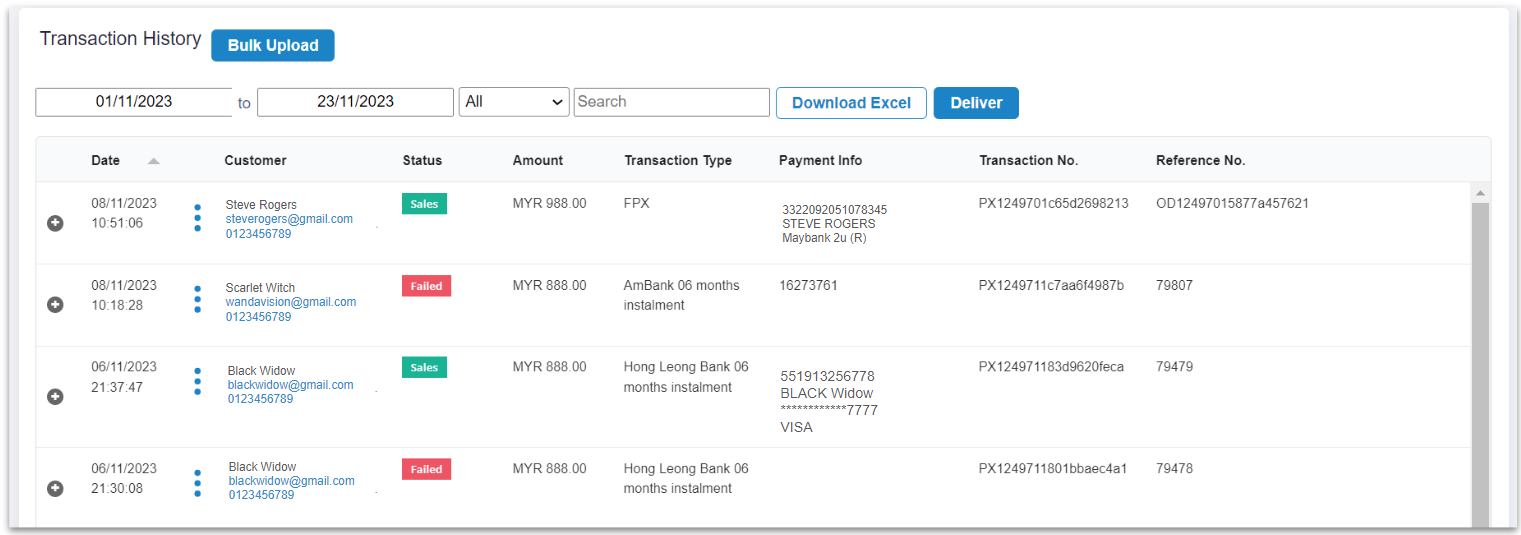
- You get to monitor your detailed transactions on Payex Portal > Click “Transactions” at the side bar
- You may also download the transactions in Excel for tracking purpose
What to take note of: #
- You may refer to our customer journey guide here on How to pay via Credit Card Instalment link
- As per bank industry practice for credit card instalment payment plans, customer is able to track transaction on their monthly credit card statement. Refer here for example


